Best Practices for Browsing Records

Much of the information presented to you in our programs is displayed in browse-tables. These are simply lists of items sorted and filtered as you need. This section describes some of the common features that are used in most of the browse tables you will be using. Learning these simple tips can save you time.

typical browse table
Click for larger view

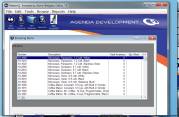
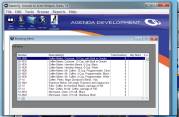
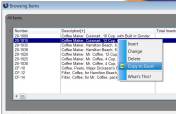
Browse tables show you a list of related items. The one on the left shows a list of part numbers. Items in the list are usually sorted by the first column. Sometimes there are more columns displayed to the right. You can use the horizontal slider control to scroll the list to see other items.

You can move through the list by pressing the cursor up & down keys. You can also move by clicking in the vertical slider region.

To locate an item quickly, just start typing. In this list of part numbers, pressing the "5" key would move the selector bar to the first part number starting with "5". Pressing "4" next would move to the first part starting with "54". This is a very fast way of locating items.


You can change the order of items in the list by clicking on the header column you wish to sort by. Clicking a second time reverses the sort order. Holding the Ctrl key down while clicking an second or third column adds that sort. For example, you could sort customers by state, then click Ctrl-ZipCode to list all customers sorted by state, then by zip code. You could even add a third click on the customer's name to arrange the customers alphabetically in each zip code.


sorting by clicking on column header
Click for larger view
 
select columns to display
Click for larger view

You can also select which columns to display. Right click on the column descriptions and select "Columns..."

You may also change the displayed order by left clicking and dragging the columns into the order you desire.

MasterQ will remember which columns and the order you wanted to view the next time you run the program.


Browse tables may be filtered to display only the records you are interested in. These filters may be quite involved if required and may be easily saved for re-use later. NOTE: the filters you save are yours exclusively and are not shared with other users of the program.


Filter browse table
Click for larger view
Selecting data to export
Click for larger view

Once you have sorted, filtered and arranged the information the way you want it, you can export it to an Excel spreadsheet with just a click of the button.

Right click anywhere in the listed data and select "Copy to Excel"


Find out how to get MasterQ here!